Add Qvalia Payment Gateway to a WooCommerce website
Requirements:
- WordPress (version 5.8 or higher recommended)
- WooCommerce 4.8 (or higher)
- Qvalia account with Autobilling subscription
- Qvalia Payment Gateway widget file
To enable Qvalia Payment Gateway, you need to create your widget on the Qvalia platform in Company Settings > Apps > Widgets. You need a separate payment gateway widget for each WooCommerce website. Follow these instructions to install Qvalia Payment Gateway on your WooCommerce website:
1. Install the Qvalia Payment Gateway plugin in your WordPress environment by adding the ZIP archive to the plugins directory or downloading it from WooCommerce extensions.
2. In WordPress Admin (wp-admin), go to the “Plugins” section and activate the “WooCommerce Qvalia Payment Gateway” plugin.

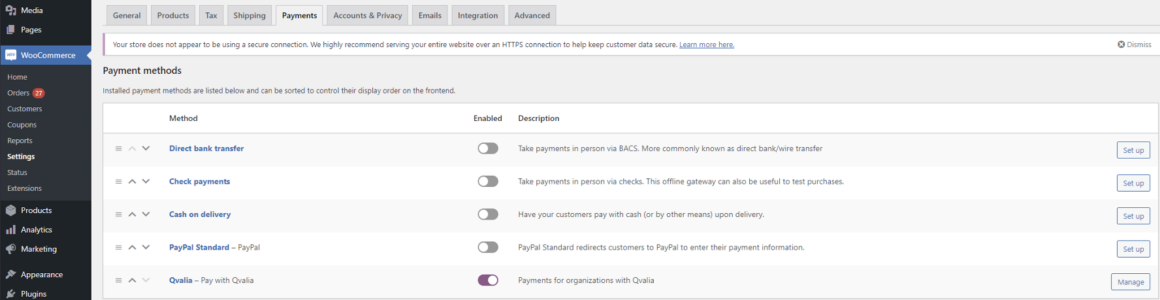
3. Go to “WooCommerce” and “Settings”. Chose the tab for “Payments” and enable Qvalia in the list by switching the toggle to on. Next, click “Manage” at the right-hand end of the listing.
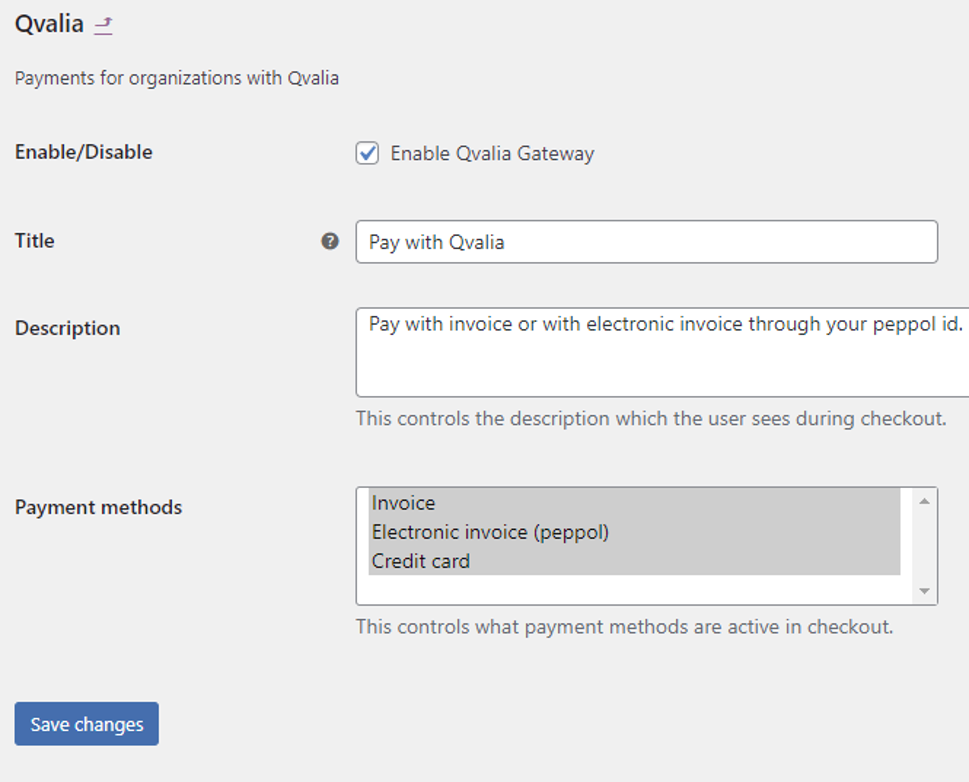
4. You can edit the plugin’s title and description, which will be visible to customers on your checkout page.
5. Activate the payment options you wish to enable in “Payment methods”. Credit card payments are processed using Stripe technology.
6. Click “Save changes”.
7. Go to “Settings” and “Qvalia Gateway” and choose which Qvalia environment you want to enable for your website.

8. Chose which environment you want to enable.
9. Add the API key and the API secret key. Your keys are on the Qvalia platform in Company Settings > Apps > Widgets.
10. Enable the “Qvalia company search” option if you want your customers to be able to look up their company information (Name, address, and registration number) for a simplified checkout.
11. Select the “Require company details” option if you want only to allow registered companies to purchase from your website.
12. The “Debug mode” should be off in production but might provide valuable debugging during testing and quality assurance.
13. Click “Save changes”.
14. Done!
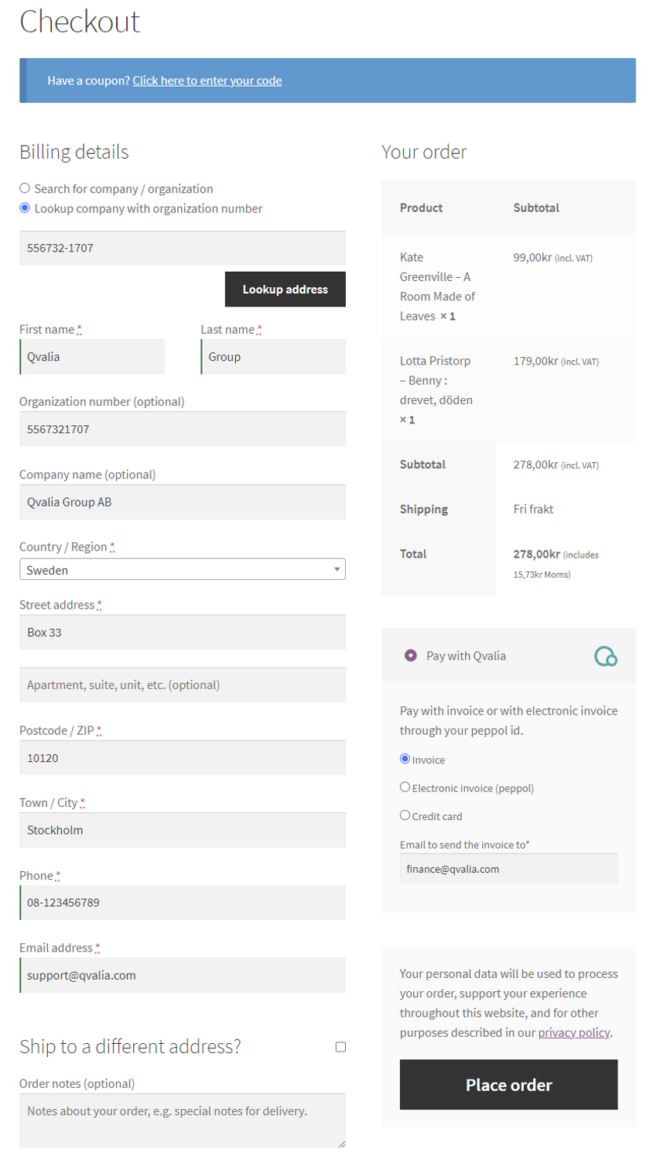
At checkout on your WooCommerce website, your B2B customers can now use the “Pay with Qvalia” option, populate information with “Company lookup”, and receive automatically created and distributed purchase invoices. In addition, your customers can also choose to pay directly with a credit card.